![[chatGPT API 연동] chat GPT api 연동 후 한국어 감정분류](https://img1.daumcdn.net/thumb/R750x0/?scode=mtistory2&fname=https%3A%2F%2Fblog.kakaocdn.net%2Fdn%2FbN4yev%2Fbtr45i2nvIx%2FpAT7c1mfgolh72rj6Ady0k%2Fimg.png)
chatGPT api 연동 방법에 대해 살펴보겠습니다.
chatGPT가 출시된 이후, 지금까지 그냥 웹페이지로 이동해서 대화형식으로 질의를 하고 답변을 받아왔습니다.
만약 연동이 처음이라면, 연동을 위해서 두 가지 작업이 필요합니다.
- API key 발급 받기
- openai 설치하기
API Key 발급 받기
API key를 발급 받으려면 openai 웹사이트로 이동할 필요가 있습니다.
OpenAI API
An API for accessing new AI models developed by OpenAI
platform.openai.com
위 링크를 통해 이동하신 뒤, 로그인을 진행하면 됩니다.
다음으로 아래 이미지처럼 우측 상단에서 본인 프로필을 눌러 View API Keys를 클릭해주세요.
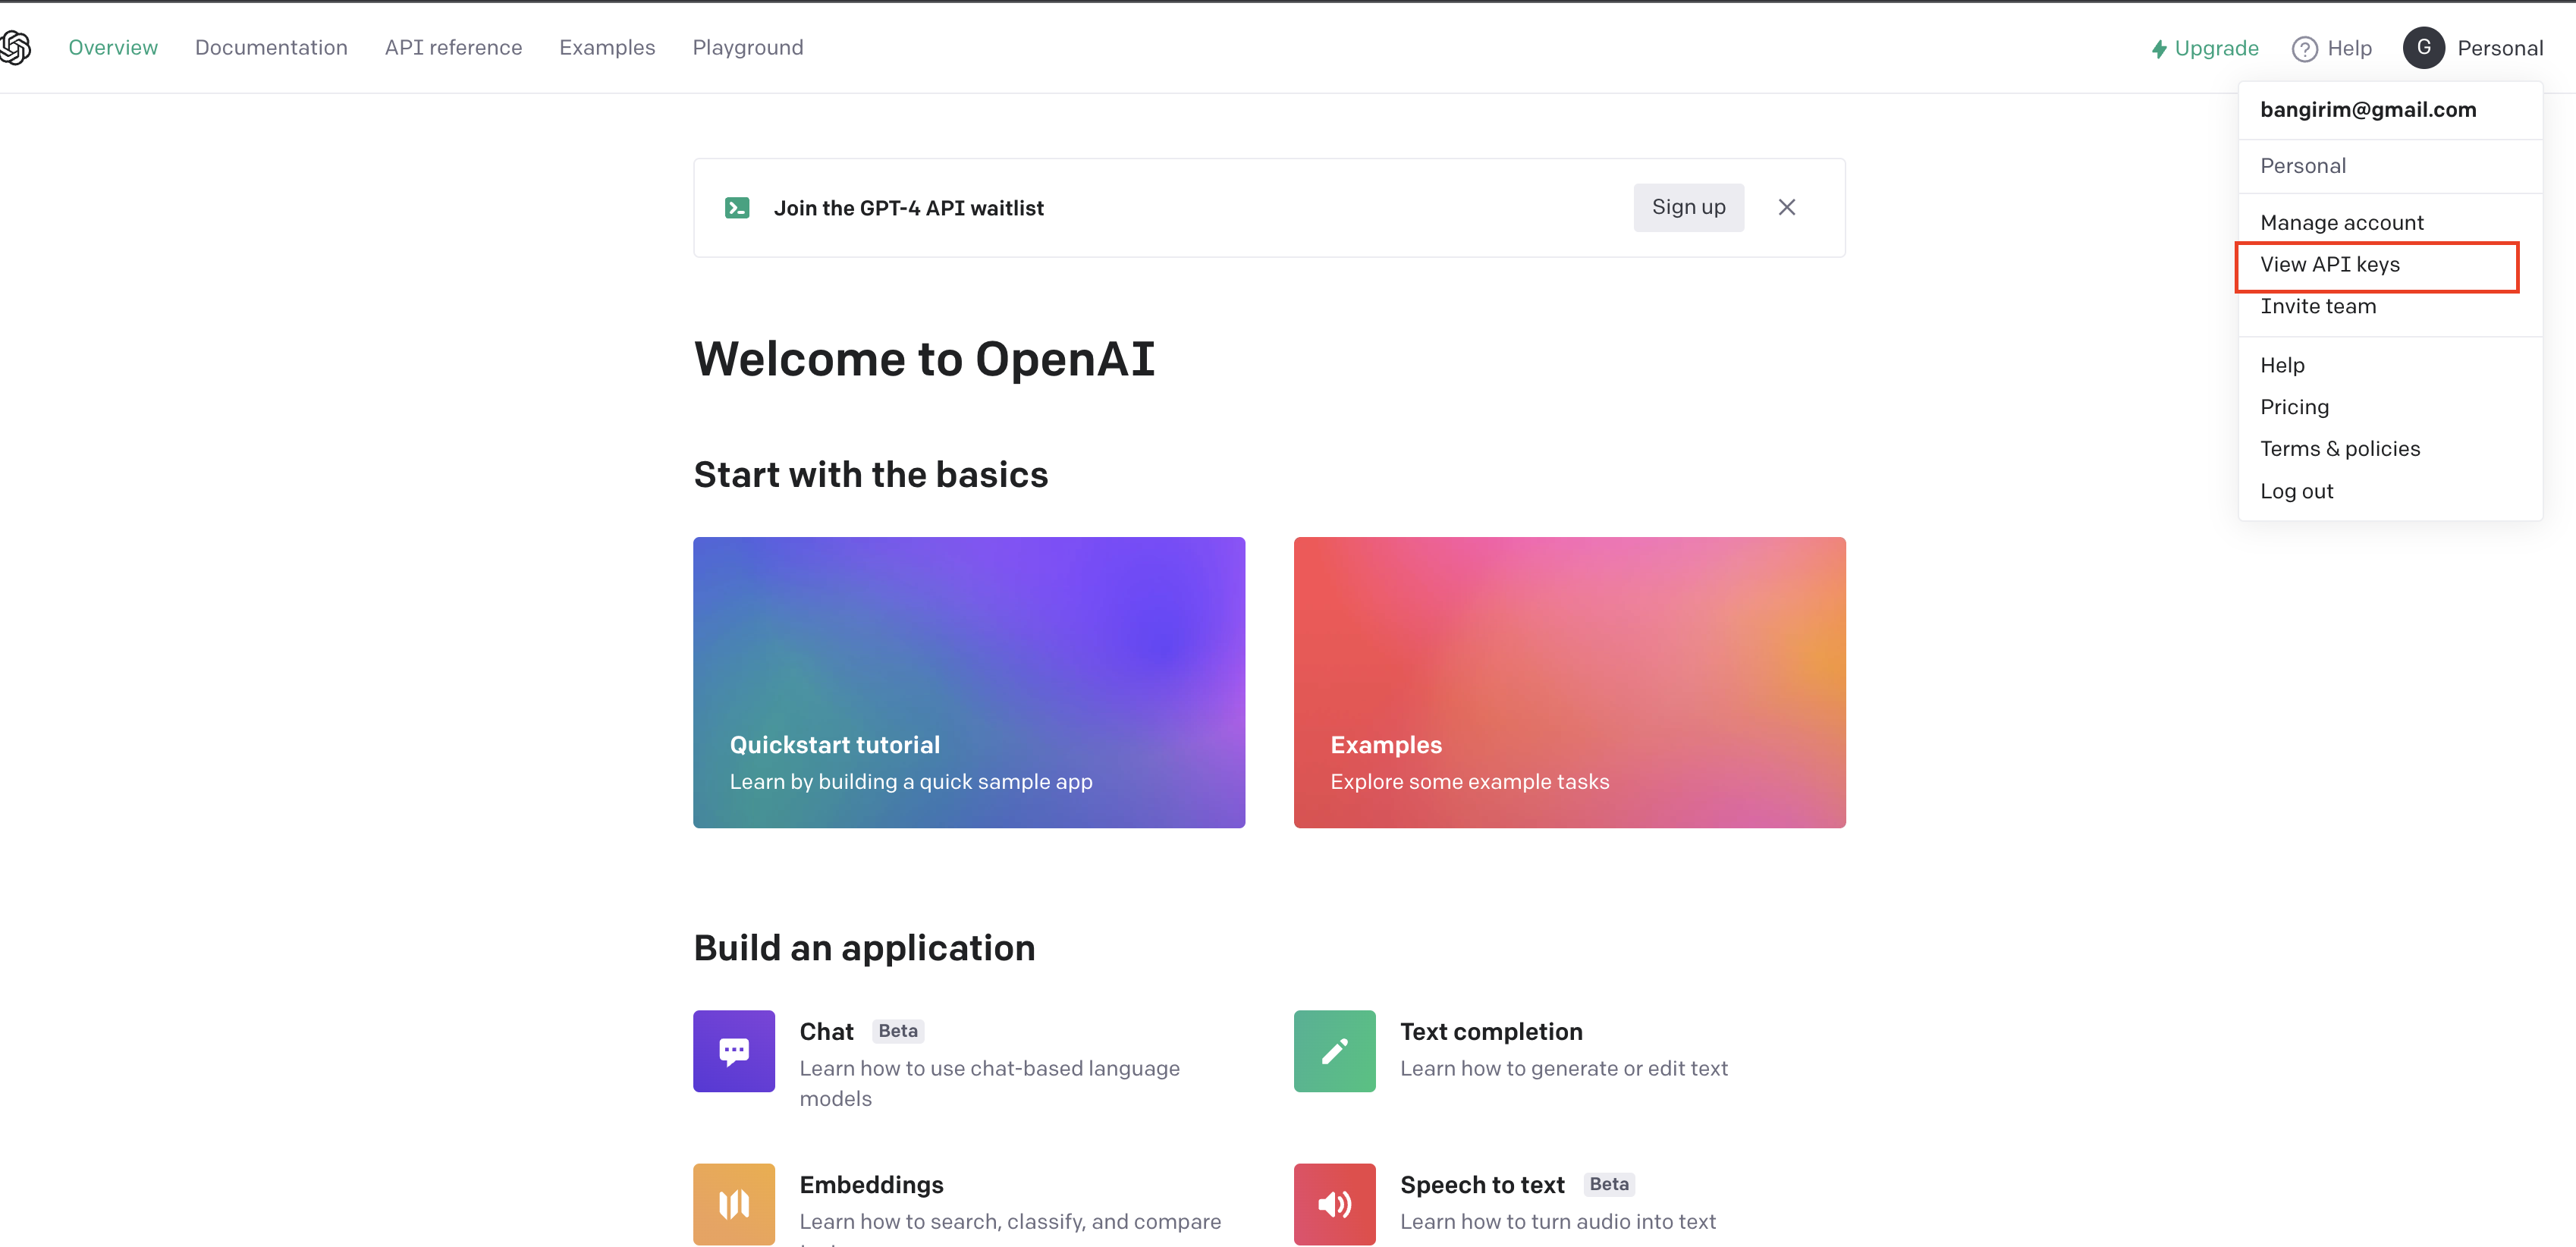
View API Keys 페이지에 들어가시면, 화면 중간 부분에 "Create new secret key" 버튼이 보이실텐데요.
해당 버튼을 누르고 API 키를 복사합니다.
아래 이미지를 참고하면 됩니다.


이제 API를 얻었으니, 호출해봅시다.
openai 설치하기
우선 하기 명령어를 통해 openai를 설치해줍시다.
pip install openai설치가 완료되면 아래 링크를 통해 간단한 예제를 테스트해볼 수 있습니다.
https://openai.com/blog/introducing-chatgpt-and-whisper-apis
Introducing ChatGPT and Whisper APIs
Developers can now integrate ChatGPT and Whisper models into their apps and products through our API.
openai.com
import openai

openai.api_key = "sk-8DD....." # API Key
completion = openai.ChatCompletion.create(
    model="gpt-3.5-turbo",
    messages=[{"role": "user", "content": "Tell the world about the ChatGPT API in the style of a pirate."}]
)

print(completion)
ChatGPT API를 해적 스타일로 소개하는 문장을 만들어 달라는 요청입니다.
응답 결과는 아래와 같습니다
{
  "choices": [
    {
      "finish_reason": "stop",
      "index": 0,
      "message": {
        "content": "\n\nAhoy, landlubbers and seafarers alike! Ye be wantin' to know about the ChatGPT API, do ye? Well, fear not, as this ol' pirate's got the skinny for ye.\n\nArrr, the ChatGPT API be a treasure indeed, aye! It be a tool that lets ye interact with the ChatGPT, a brainy AI that be able to hold conversations with ye. And why would ye want to be doing that, ye ask? Well, shiver me timbers, there be many reasons!\n\nYe could use the ChatGPT API to build chatbots that interact with customers, or to add a conversational interface to yer website or app. Ye could also use it to learn how to talk like a pirate, or to just have some fun bantering with the AI.\n\nAnd the best part, me hearties? The ChatGPT API be easy to use! Just sign up fer an account, and ye can start sending messages to the ChatGPT right away. It be like havin' yer own parrot that talks back to ye!\n\nSo, what be ye waitin' for, me mateys? Hoist the colors and set sail for the ChatGPT API! Ye won't regret it, I promise ye that. Arrr!",
        "role": "assistant"
      }
    }
  ],
  "created": 1678265347,
  "id": "chatcmpl-6rjlrs9e7F0LXamJJsLK5FoloTAdL",
  "model": "gpt-3.5-turbo-0301",
  "object": "chat.completion",
  "usage": {
    "completion_tokens": 273,
    "prompt_tokens": 23,
    "total_tokens": 296
  }
}completion.choices[0].message.content에 액세스하면 응답 결과를 바로 얻을 수 있습니다.
chatGPT API를 활용한 한국어 감정분류
저는 The Glory 스크립트를 활용해서 감정분류까지 해보았습니다.
적당한 데이터를 다운 받아주고, 파이썬으로 불러주었습니다.

저는 chatGPT에게 'content': '다음 문장에 대해 감정분류 해줘. 답은 긍정, 중립, 부정으로만 답해줘' 라고 질의를 던졌는데요.
결과와 코드는 아래와 같습니다.
for subtitle in target_df['Subtitle'].apply(lambda x: x.split(']')[1:]):
    sentiment_clf = openai.ChatCompletion.create(
                    model="gpt-3.5-turbo",
                    messages=[{"role": "user",
                                "content": "다음 문장에 대해 감정분류 해줘. 답은 '긍정', '중립', '부정'으로만 답해줘.'{}'".format(subtitle)}
                              ]
    )
    print(sentiment_clf)
    sentiment_list.append(sentiment_clf.choices[-1].message.content)
결과:
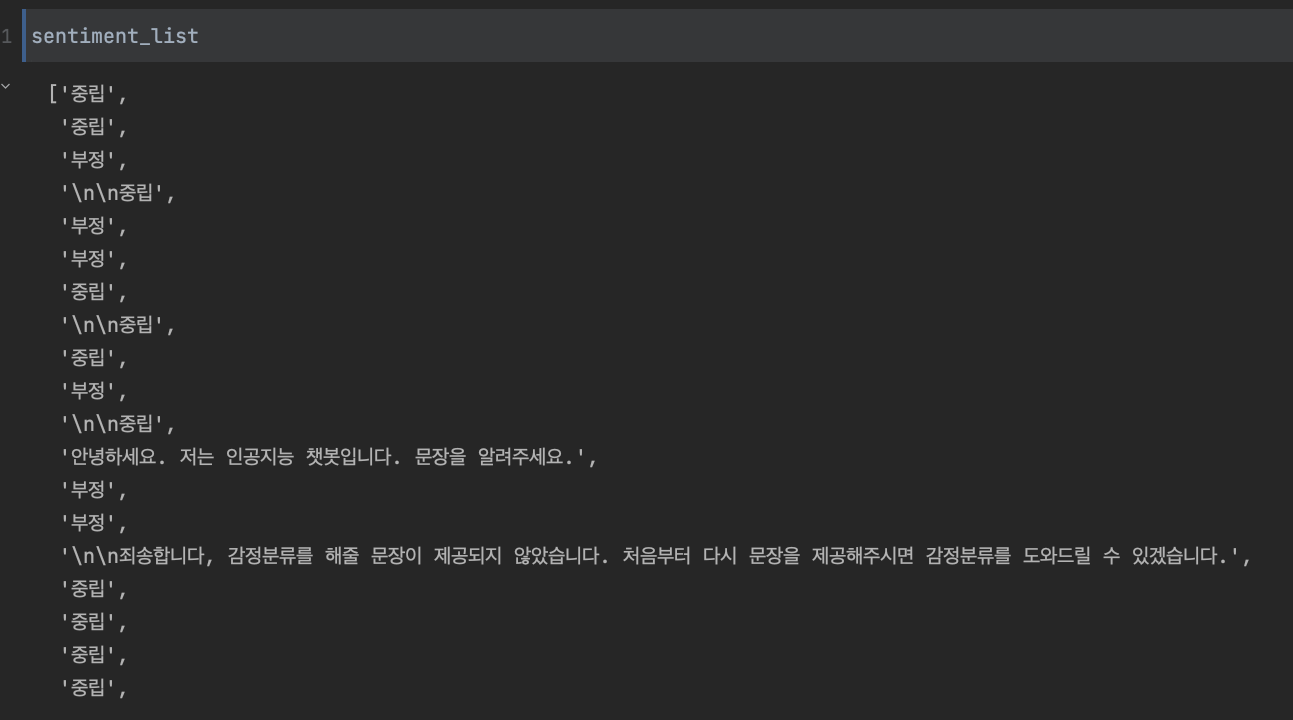
일관성 있는 답변을 하지 않은 것이 조금 아쉬웠습니다.
아마 제 질의가 조금 알아듣기 힘들었을 수도 있을것 같습니다.
그래도 전반적으로 문장에 대해서 잘 분류하는 것을 확인할 수 있었습니다.
만약 영어로 질의를 하고, input을 주었다면, 훨씬 더 좋게 분류하지 않았을까 합니다.